Kseniya Sibileva
Expert blog
By Kseniya Sibileva UPD: 2 min read

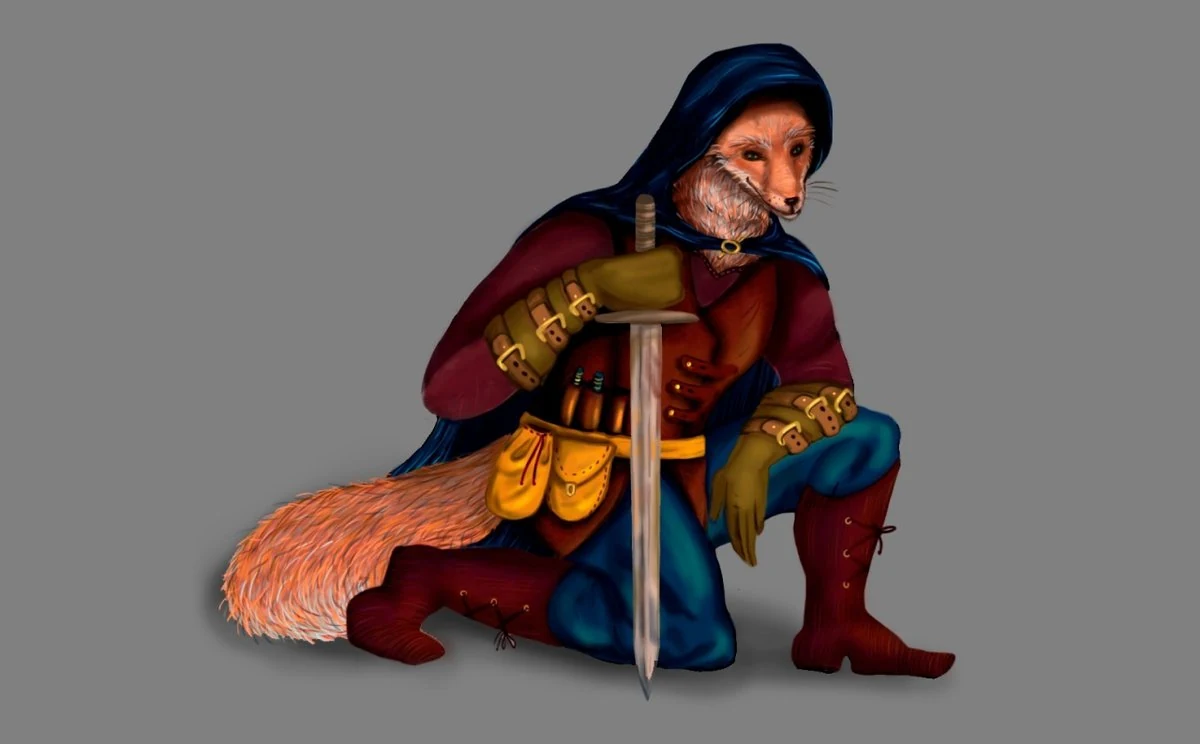
How to create convincing volume in a drawing?

Hello, everyone! SunStrike Studio creates graphics for mobile and computer games. Below you will find detailed feedback on one of the tasks performed as part of our open test assignment. The author of the work has given us permission to publish this information.

Stylized female warrior concept with sword and shield, painted in warm earth tones against a desert background
Art of the artist Victoria Lemeshevskaya

Very often artists rush to work on the details of the work, forgetting to lay down a foundation. This is how we end up with objects where each detail has a unique source of light, with the resulting image falling apart into individual components instead of looking as one whole object. Tackling the work in stages can help novice artists avoid such mistakes:

Same warrior character painted on a flat averaged background to demonstrate base values before detailing

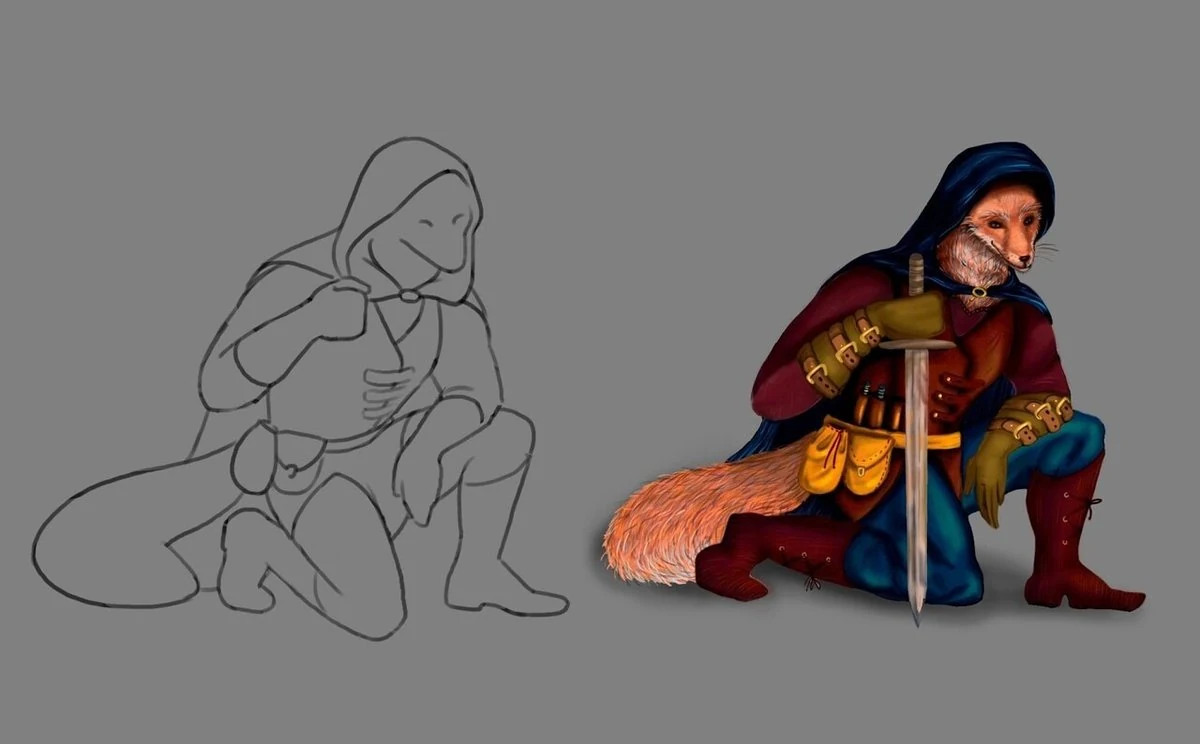
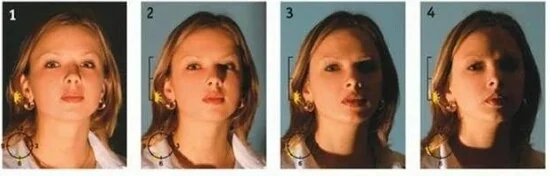
Search for references: Real life references make made up ideas seem more convincing. They make it easier to get a sense of volume and anatomy. Photographs also help select poses that would look “stable” without being “stiff”:

The sword in the image below is missing to give a better view of the structure of the body behind it:

Reference photo of a woman in a similar combat pose used to study the body structure under the warrior's armor

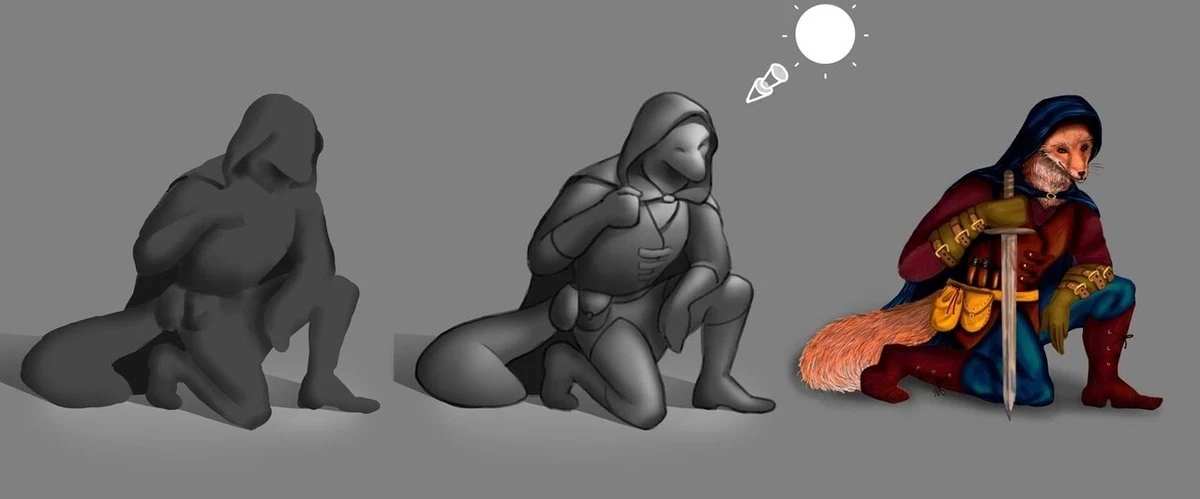
Lighting: The simplest way to start working with volume is to use an averaged out canvas and draw a sketch of the image with the lighter color that will be used for the brightest areas:

Mid-tone canvas with the warrior silhouette blocked in using the lightest highlight color to map where light hits

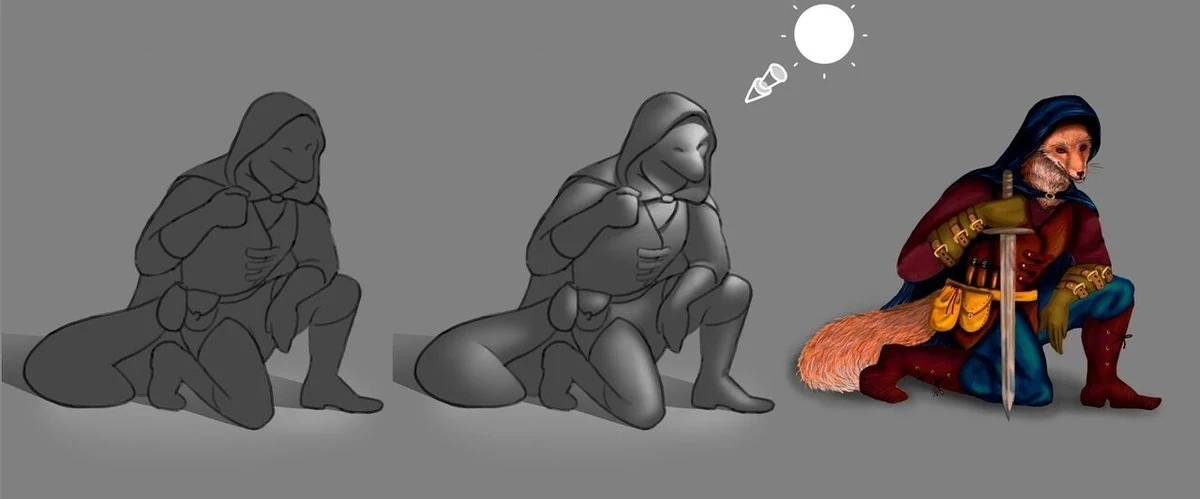
If you have trouble imagining how the light will fall, once again, use references:

Photograph of a sunlit figure used as a lighting reference for the highlight and shadow placement on the character

Once the lit areas are defined, it becomes easier to determine which sections will be in the shade:

Warrior painted with both highlights and shadow zones blocked in, showing how the body and armor read as solid volumes

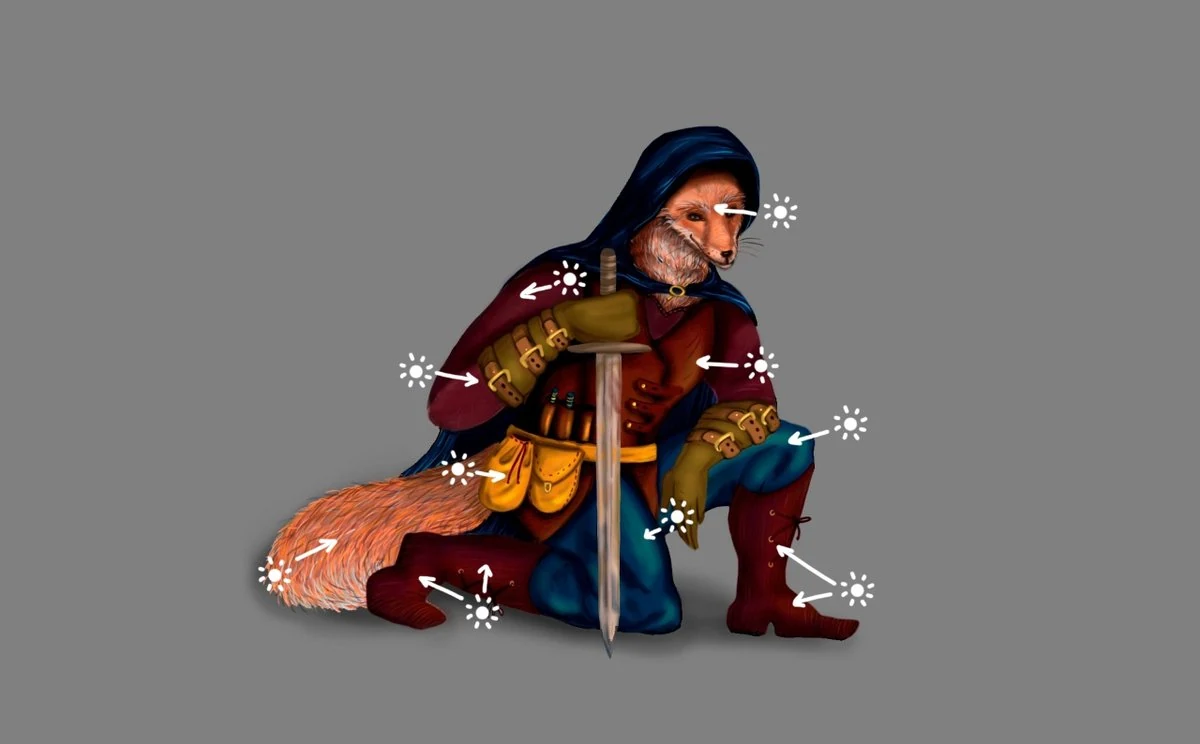
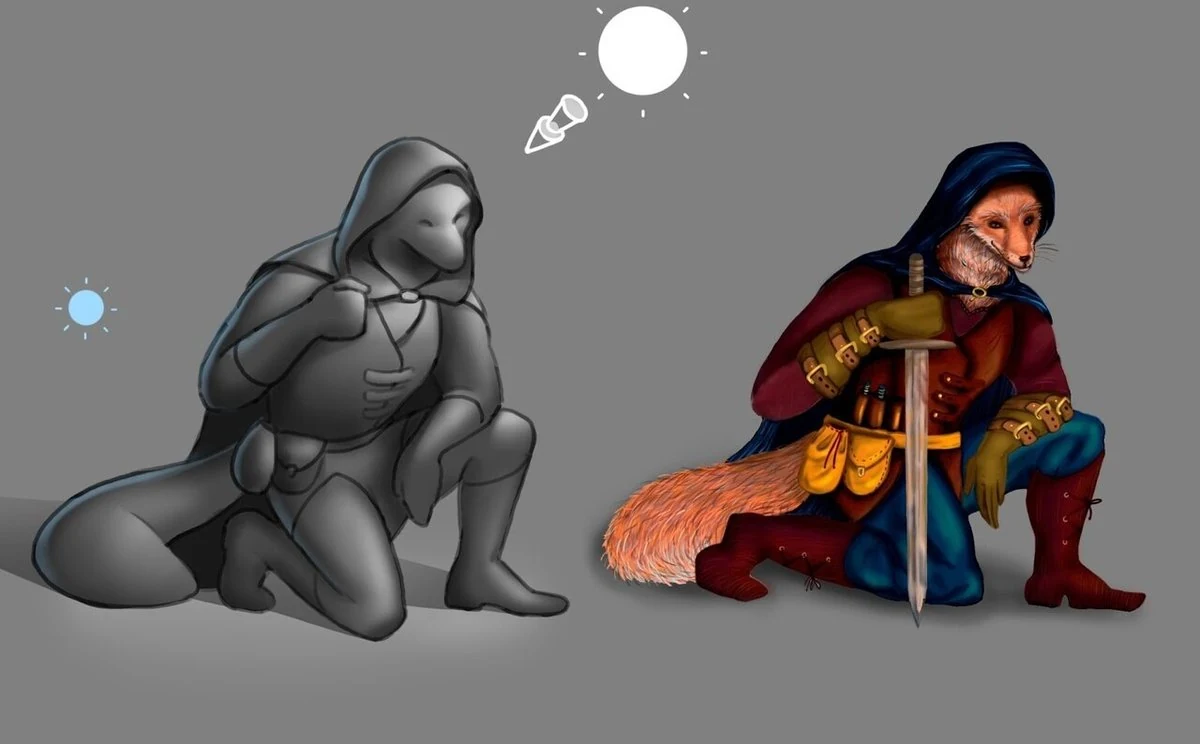
Using additional light sources such as rim light will help give the image even more volume:

Same character with a rim light added along the edges of the body and armor to separate the figure from the background

If you are not confident about whether the light has been applied correctly, there is a quick test that could help you check it - try “slicing” your picture, it will make the problem areas more apparent:

The painted warrior cut into vertical strips against a checker pattern to test where the light direction breaks down

To summarize, we recommend that you always take time to think your work through, do not rush starting on the details, and take time to assess the “framework” of you piece. Moving from the bigger picture to details is much simpler than trying to piece together tiny pieces of the puzzle. Look for more test task reviews from us in the near future!

If you would like a deeper look at how our team approaches concept fundamentals, see our game concept art and design work, or browse 2D game art outsourcing and game character art design services for more examples of finished pieces built on the same principles.

Frequently Asked Questions About Volume in a Drawing

+ Why does a drawing fall apart when each detail has its own light source?

When artists rush into details without laying down a foundation, every element ends up lit from a different direction. The eye reads each piece separately instead of as one whole object, and the image stops feeling solid. Working in stages - silhouette, base lighting, then detail - keeps the whole picture under one light setup.

+ How do real-life references help with volume and anatomy?

Real references make made-up ideas seem more convincing. Photographs are easier to read than imagined lighting and let you pick poses that look stable without being stiff. They also help you understand how light wraps around an actual body, which is what you are simulating in the drawing.

+ What is the simplest way to start working with volume?

Start from an averaged-out canvas and sketch the image with the lighter color you plan to use for the brightest areas. Once those lit zones are blocked in, the shadow areas become much easier to define, and the volume reads almost automatically.

+ What is the slicing test for checking light?

If you are not sure the light has been applied correctly, try slicing the picture - cutting it into vertical or horizontal strips in your head or on a separate layer. Problem areas, where shading does not match the established light direction, become much more apparent once the image is broken down this way.

HOW CAN WE ASSIST?
LET'S BUILD SOMETHING
INSPIRING TOGETHER

Every project is an opportunity for innovation. By blending our R&D-driven approach with creative synergy, we craft distinctive visual identities that redefine standards in gaming and digital art.

info@sunstrikestudios.com